With the vast number of DIY Christmas possibilities on Pinterest,
deciding which project to tackle wasn't the easiest thing in the world.
{I know, I have a difficult life.}
Christmas trees hold a special place in my heart,
and I love all variations as decor.
Add to that the fact that I had lots of vintage sheet music on hand,
and I was sold!
Shall we get started?
Here's the supply list:
:: foam cones, in varying sizes
:: vintage sheet music
:: scissors
:: hot glue gun
:: paper cutter, if you have one
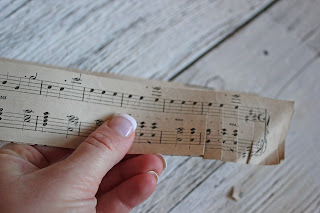
1. Cut 1.5" wide strips from your sheet music.
2. For the length of the strip, make cuts that are about 1" long, spacing them approximately 1/4" apart.
3. After all the cuts are made, roll the strip of paper into a cylinder. My paper was truly vintage and a little brittle, so this step wasn't easy! But it is important to get the paper to curl. After that is done, gently unwrap the strip and run a line of glue on the base of the cone.
4. Glue the strip around the perimeter of the tree and gently separate the fringes.
Continue gluing the strips of paper to the tree, moving towards the top. There shouldn't be much of a space between the strips of paper, unless of course, you want to see the white of the cone peeking through! {Ask me how I know}
Note: This project is a great one to do while the baby is napping and you can watch your favorite show on TV! :)
Now my next "big" decision is where to display these baby trees!
What's your latest Christmas project? I'd love to hear about it!!


